Showing posts with label TFT screen. Show all posts

Wednesday, 10 August 2022

Re-purposing Things

Just over three years ago I wrote about a 3.5in TFT colour screen I had bought for use with the Arduino Mega. You can read about it HERE. The last thing I used it for was to try to show the minute changes in the Earth's magnetic field. That worked but the magnetometer (the bit of hardware which detects the changes) needed to be buried at least 3ft deep away from any other influences, like passing traffic as the metal vehicle body is enough to change the magnetic field.

DSCN0731c

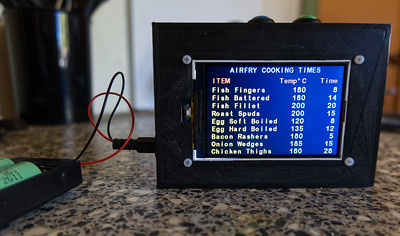
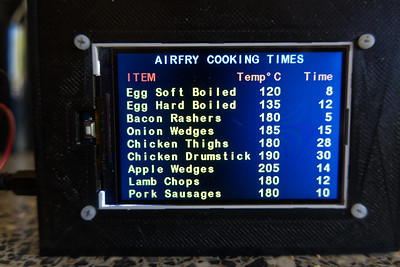
I gave up on that idea for now but when I bought the Airfryer I found myself forever looking up recipes, especially temperatures and cooking times, for various foods. I started to write them down and then a flash of inspiration! Re-purpose the display to show a list of the items of food I will be airfryijng. Well it rook a lot longer than I thought to get an Arduino sketch (program) to work as it was the first time I had worked with arrays which contained more than one character in each entry. As always it was my lack of understanding when and where to define static, unchanging, and changeable integers, arrays and character strings. After the best part of three days reading and testing I finally made it work as I wanted.
IMG_0651

Powered by two lithium rechargeable cells. The green and blue buttons on top allow me to scroll up and down through the list.
IMG_0652

Three days of muttering, reading, rewriting code seems a lot for what ended up as less that 100 lines of code but I learned quite a lot and am finding it a useful addition to the kitchen clutter.

Monday, 29 July 2019

Not Much to Look At - Yet

It was about time I put the 3D printer back into use.  I have an idea for a different way to display weather information, including air quality, using the 3.5 inch TFT colour display connected to an Arduino Mega. To that end I have started designing a front panel for an enclosure for all the gubbins.

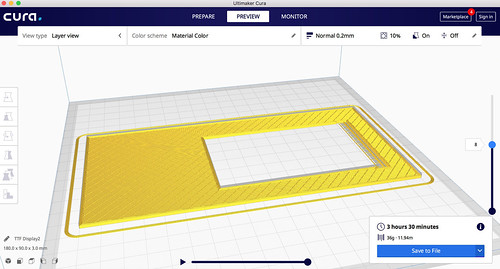
Measured the size of the actual display panel and used TinkerCad to start designing a 3mm thick panel.

Design2T

Saved the instructions as a .stl file which was loaded into ultimate Cura to make the instructions the
3D printer needs

Design2C

This is actually mk2. With the original simple cut out (which amazingly fitted first time) there was a slight problem. The right hand side of the display circuit board has many pins for the connections. They stopped the display from being perfectly flat. As might just be discernible on the above picture there is now a cut out section 1.5mm deep to take care of this.

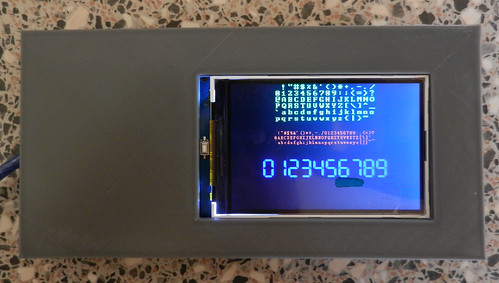
Photo of mk1 prototype with screen fitted (just showing a font test program)

DSCN9893

Another section which will probably have a bit of work done is on the left hand side. There is a reset button on the circuit board so I will have to redesign the filled area to fit round this. It's a slow old job as each 3D test print takes about 3.5 hours to complete.

Marks on the screen are from the protective clear plastic covering which I have left in place.
Related Posts with Thumbnails