Wednesday, 7 August 2019

Church of St Leonard, South Cockerington

I have been meaning to visit the Church of St. Leonard, South Cockerington, Lincolnshire for a while and wanting to try out the Canon M5 mirror-less camera gave me the incentive. I took the camera fitted with a Canon EFS 17-85mm zoom lens and a Speedlight flash gun to use inside. As the church is at the end of a long, narrow, winding lane I was very relieved at not meeting any traffic coming in the opposite direction.

car video clip
Movie clip 2

There was just enough room to park one car off the lane by the entrance to the church.

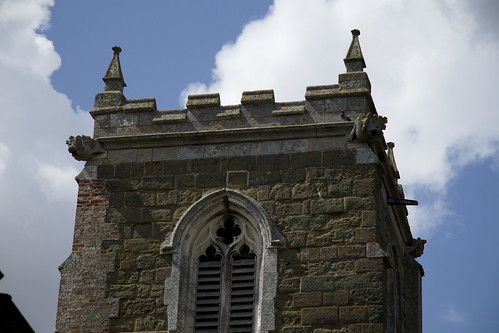
First view of the early 14thC, late 15thC and 19thC restored church

IMG_0028

The only gargoyles I noticed were near the top of the tower

IMG_0075

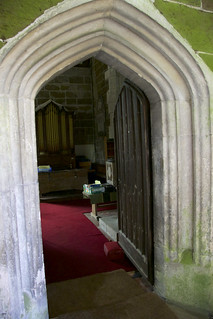
Inside the North entrance porch with its plank door

IMG_0056     IMG_0053

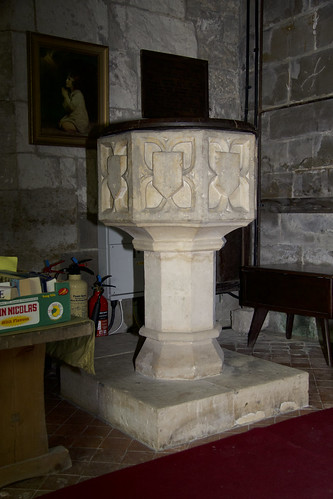
Once inside we see the font

IMG_0052

The view looking to the East where the 15thC screen can be seen

IMG_0037

Restored in the 19thC

IMG_0039

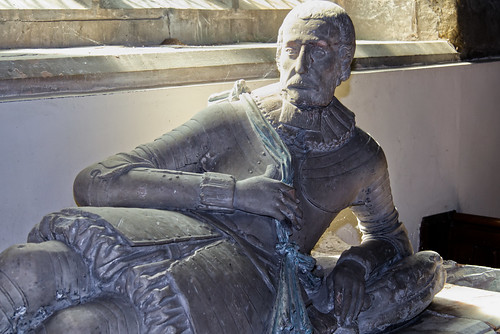
To the right of the screen is a large alabaster monument to Sir Adrian Scrope who died in 1623.
The figure rests on a tomb chest of white and pink streaked marble on which are panels depicting two kneeling daughters and six sons

IMG_0041

IMG_0040

IMG_0047

Taking a peek through the screen the choir stalls and altar can be seen

IMG_0043

In the walls either side of the altar are small niches

IMG_0046

Returning to the West end of the church we see the small chamber organ.

IMG_0035

This has memories and a small connection with my family.
My father played the organ at several of the local churches. Many years ago the S. Cockerington parish decided they would like an organ, the church not having one at that time. This one was in a church which had dropped out of use and permission was given to move it to St. Leonards. My father and I were asked for advice on how to dismantle and move it safely so one weekend we went along and helped. The firm advice given was in the handling of the pipes. Many have a high lead content which gives them the traditional sound. Consequently the metal is very soft and easily damaged. A group of us carefully dismantled the organ, labelling all the pipes and where they fitted, transported it and re-assembled it in its new home. After that a professional organ tuner was engaged to finish the job of retuning it. He complimented us on the care we had taken when moving the organ.

By the way, all the windows are fitted with plain clear glass so no stained glass to photograph this time.

Back outside to have a look round.
The West entrance at the bottom of the tower

IMG_0057

A view of the South side

IMG_0058

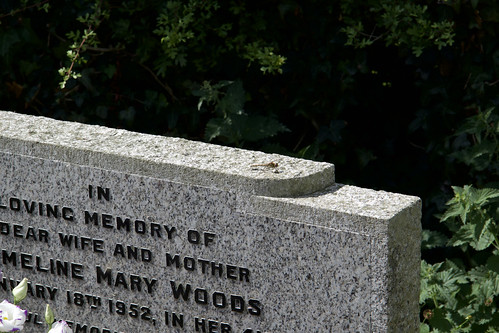
A couple of grave stones

IMG_0031

The oldest one I spotted

IMG_0060

The inscription reads:
"Here lies the body of George and Eliz
Son and daughter of George and Rebecca Dunham
Both departed July the 7th 1759
He in the 19 she in 17 year of their ages
They're pluck'd like roses not full blown
(the next line is well worn or scratched out)
(It appears to read 'As you a bove may see')
To heavn I hope they both are gone
To reign eternally"

A view from the far end of the spacious graveyard

IMG_0066

The only other visitors I saw

   IMG_0063

About ten common darter dragonflies

IMG_0064

Then the drive back home along that same narrow, winding lane.

All photos were taken in RAW, batch converted to virtually lossless jpgs with Preview. Some were cropped or tweaked slightly with Affinity Photo on a Macbook. I found the M5 fairly difficult to hold with the extra weight of a zoom lens and Speedlight. Also I found it too easy to accidentally press the video button when holding the camera in portrait mode. Otherwise I am pleased with the results. It was very useful at times to tap the touch screen to choose where I wanted it to focus.


Tuesday, 6 August 2019

A Couple of Test Shots

Yesterday I decided to invest in the Canon M5 mirrorless camera which duly arrived a few hours ago. I chose the starter pack which included the body, 15-45mm lens and the Canon adaptor which allows me to use all my old Canon lenses on this body. Having looked at some reviews I liked the touch screen which lets me choose where I want it to focus. Also, though not tried out yet, I was impressed with the independent demo videos which showed how effective the anti-shake could be on hand held videos.

Here are a couple of quick test photos.
Penny taken in jpg form and cropped in Affinity Photo. A reasonable test of bright and dark mix.
Using the M lens provided

IMG_0001c

Cloud formation. Taken as RAW and processed as jpg in Affinity Photo with slight increase in the shadow area. (Much better than the same shot in jpg form saved in the camera)
Using the Canon 17-85mm older fitting lens with the adaptor provided

IMG_0009a

Slight worry when I connected the camera to the Macbook as the Canon software I had didn't recognise it. Cured by installing the latest version. The M5 resolution in 24 Mpixels. The cloud RAW file is some 30MB.

It takes some ploughing through the 200 page manual to find the sections I need to set it up to suit the way I work. Easier now I've downloaded the pdf version. Next I have my eye on one of the Canon macro lenses which have LED lighting built in round the front lens.

Saturday, 3 August 2019

Weather Icons

More experimentation with Arduino and ILI9481 TFT screen.
The screen has an SD card slot which can be used for storing graphics.
Downloaded some weather icons in .png format, scaled them down and saved as .bmp files.
Those were loaded on an SD card.

Short demo:


I have also found a different library to control the screen. Much more versatile and faster than the previous one used. Unfortunately it can only recognise .bmp and .raw files so I lose the transparent backgrounds in the icon files.

Friday, 2 August 2019

RTC done

It took quite a bit of fiddling with the code to get a reasonable layout for the real time clock but I got there in then end. The time is generated in a clock chip which has a back-up battery to keep it going during power outages. One main problem was initially loading the correct time and date. There are plenty of example codes which take the computer time and upload that to the chip. The problem with those is the time taken to compile and upload the instructions. Using that method resulted in a 30 second error. In the end I found one example which allowed the data to be keyboard entered using the serial monitor which is all but instantaneous. The display is a Nokia 5110 as used in their early mobile phones and available almost anywhere on the internet for a few pounds. Though b/w it has blue LED back lights. I will probably add a switch as they are not needed in daylight.

Working clock:

DSCN9902

Just a test pattern program running in the colour display.

I had hoped to add air quality monitoring to the time display but so far that has failed. Tried several example codes but none have worked fully and when I added the code alongside the clock code the time stopped displaying!

Thursday, 1 August 2019

Front Panel Mk3

Latest design for my weather display front panel:

DSCN9898

The colour screen is moved to the left.
Space above and below reset button now covered over.
 b/w screen added on the right.
The aim being for the colour screen to show a weather forecast picked up from the internet.
The small screen to show a real time clock and maybe the air quality display.

My thinking at the moment is to use an Arduino Uno or Mini for the b/w display and an Arduino Mega to connect to the internet and display the information received graphically on the colour screen.

Tuesday, 30 July 2019

Reindeer and Clematis

These wickerwork reindeer have been riding a fence since Christmas.
Now they have sprouted some flowers:

DSCN9895

I really like this Clematis colour:

DSCN9896

Monday, 29 July 2019

Not Much to Look At - Yet

It was about time I put the 3D printer back into use.  I have an idea for a different way to display weather information, including air quality, using the 3.5 inch TFT colour display connected to an Arduino Mega. To that end I have started designing a front panel for an enclosure for all the gubbins.

Measured the size of the actual display panel and used TinkerCad to start designing a 3mm thick panel.

Design2T

Saved the instructions as a .stl file which was loaded into ultimate Cura to make the instructions the
3D printer needs

Design2C

This is actually mk2. With the original simple cut out (which amazingly fitted first time) there was a slight problem. The right hand side of the display circuit board has many pins for the connections. They stopped the display from being perfectly flat. As might just be discernible on the above picture there is now a cut out section 1.5mm deep to take care of this.

Photo of mk1 prototype with screen fitted (just showing a font test program)

DSCN9893

Another section which will probably have a bit of work done is on the left hand side. There is a reset button on the circuit board so I will have to redesign the filled area to fit round this. It's a slow old job as each 3D test print takes about 3.5 hours to complete.

Marks on the screen are from the protective clear plastic covering which I have left in place.
Related Posts with Thumbnails