
fit together to make
a partly universal fitting to add a phone (camera) to the microscope.
It was to replace the one which came with the microscope
Whilst being very adaptable as far a suiting a vast range of cameras I was never happy with the idea of suction cups as a method of holding it in place. I did once have my iPod slide off.
Unfortunately the replacement design I had downloaded and printed out was
a) fragile - I snapped one bit trying to fit it together.
b) it didn't suit the iPhone 6s with its corner positioned camera.
probably fine with phones with a camera nearer half way across their body.
I had a look round on the Thingiverse site and found another design which looked a better bet.
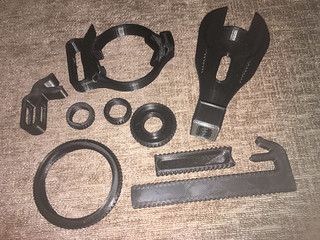
Here are the parts once printed out
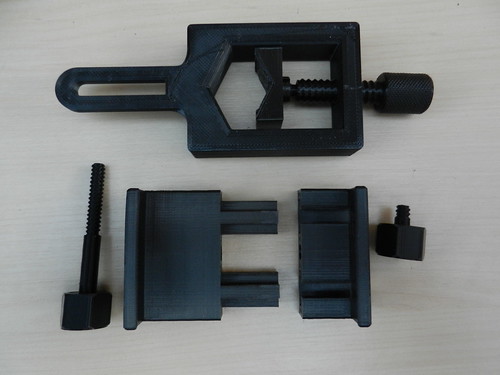
I had already fitted together the three parts which make up the bit at the top of the photo.
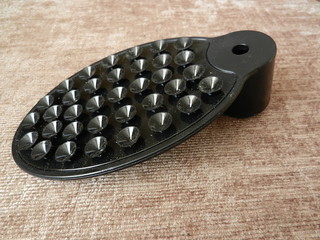
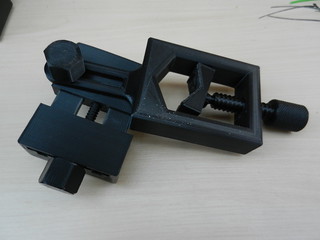
On the V shaped section there is a ball and socket joint in which the end of the screw fits. This is three sections around the ball. One of those snapped as it was too close a fit but everything still holds in place.
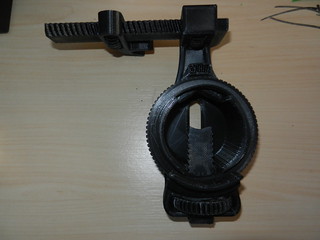
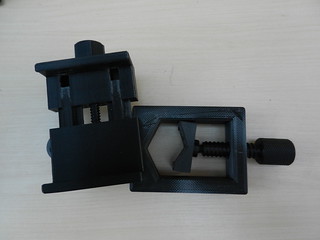
All the parts assembled
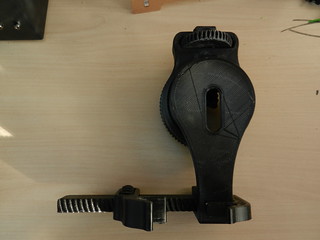
Fitted to the microscope
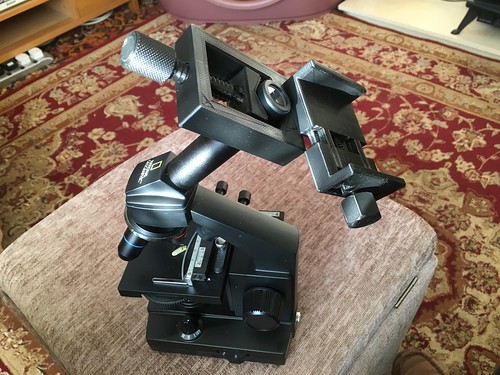
With camera firmly held in place
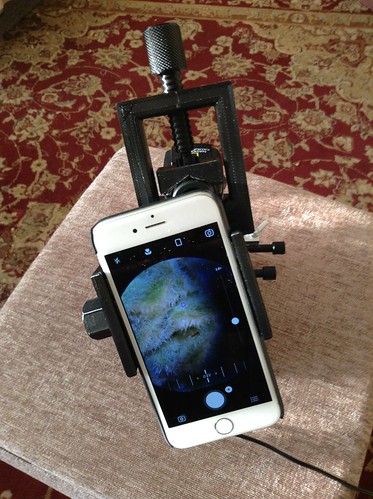
Fortunately my phone has an added cover over the back and sides which protects the volume and power buttons or the clamp would press and activate them. I think I will add some of the old style adhesive foam strip we used to use for sealing gaps in wooden window frames years ago. That should cushion any possible pressure on the phone's buttons.
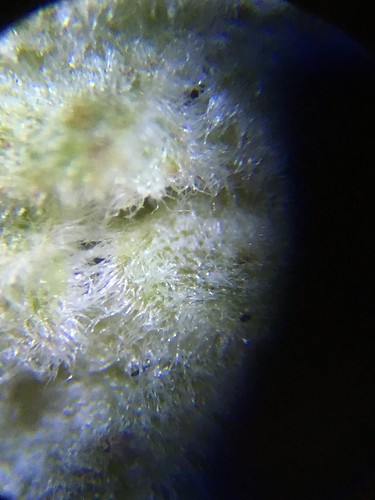
A photo of the hazel catkin with this set up
I did have problems with keeping the items stuck on the printer bed to start with. I think it was the overall low temperature in the unheated conservatory. Things were cooling down too fast. Increased the bed temperature from the usual 60C to 63C and the extruding temperature from the usual 200C to 205C and all worked perfectly.
A short video of the printer at work
I toned down the sound. The printer has four cooling fans and four stepper motors which can be noisyish at times.
My grateful thanks to user 'falconphysics' for publishing the design on Thingiverse.

You got there in the end. It looks good. I think you can get different fillament to make things stronger.
ReplyDeleteAdrian: The chap who designed it used a flexible filament, though I think he wasn't too happy the way the phone clamp bent under pressure. I have some I could use for that part but need to make an alteration to the filament feeder to be able to use it. Maybe if I reprinted that part at about 105% in X & Y directions it might fit better.
DeleteMust obtain a buffing wheel for my grinder.
ScotchBrite should work a treat..
DeleteCan the material from the broken and unused parts be re-used for more printing? Very cool project and looking forward to seeing more images from the phone.
ReplyDeleteWilma: The filament I use is made from re-cycled material though I can't use my offcuts. I have no way of making a filament.
DeleteSo glad you finally found a design that worked. I love seeing all the detail on the hazel catkin :)
ReplyDeleteRR: I've now added some foam strip to the phone clamp with is even more secure.
DeleteVery interesting as I have no experience of 3D printers other than reading about them.
ReplyDeleteDave: This is my first experience of 3d printing and like most new undertakings it is taking some time and experimentation to get the best out of it.
Delete